
A long, long time ago, I began an adventure about starting a let’s play channel, and documented my mishaps along the way for entertainment and posterity. As someone with a fairly lukewarm relationship with technology, I had hoped that maybe the average person would benefit from the walk-through guide I had created, as I tried to include information that I hadn’t found in other places on the interwebs, and perhaps bypass a few of my mistakes.
Well, hold on to your keyboards, guys, because it finally happened: my Playstation 4 ran out of memory and I had to replace the hard drive.
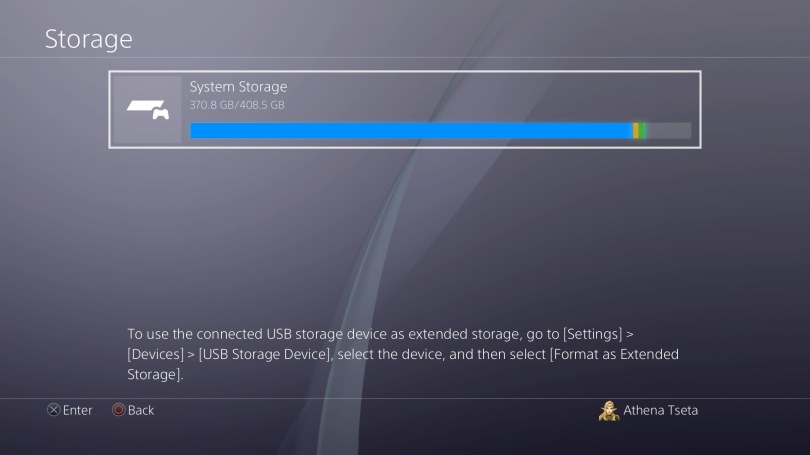
After some initial apprehension, I did a little research and decided to replace the old 500GB hard drive with a 2TB solid-state hybrid internal hard drive. I used a drive that was manufactured by Seagate, and sprung for the kit that included a case for the old drive and a fun little screwdriver, as well.
Inside the box was everything necessary to change out the hard drive, including:
- instructions
- a screwdriver (eyeglass screwdriver-sized)
- 16GB flash drive
- a metal case for the old hard drive and the necessary screws
- the actual 2TB hard drive itself

But first things first. You can’t just go in there and rip out your hard drive and slap in a new one and expect everything to be okay. While your games can’t be directly transferred over to the new drive and will need to be re-downloaded (and, I found out, digital game purchases are saved so no need to fear losing all your digital games or DLC), information like save files, screenshots, save files, video or music clips, and save files are saved on the hard drive and need to be brought over manually.
Did I mention save files? Yeah, don’t go breaking your own heart by losing all of those hard-earned victories.
So the first thing you want to do is take the flash drive, stick it into your computer, and make sure that its formatted as “fat32.” After that, head over to Playstation’s website and download the latest software version (you can do that here if you are actually replacing your drive currently).

This takes a few minutes, so grab yourself a tea or coffee or other preferred beverage and come back in a bit.

Once done, take the flash drive from the computer and plug it into one of the front USB ports of the Playstation 4. It’s time to start copying files!
Easiest to do first are the screenshots and any videos you might want to save, which can be done through the capture gallery options menu. After going into the gallery, click (select?) either screenshots or videos (or “all”), and then click the options button on the controller. Alternately, you can select for which game you’d like to copy the screenshots.
Select “Copy to USB drive” and then select the screenshots you want to copy (or “select all,” if you are so inclined). I did this for each game separately as I had already backed up some of my files, but I’m fairly certain if you “select all” of the screenshots at the beginning (before “Alternately” in the previous paragraph), the system will sort the pictures into folders for each game.
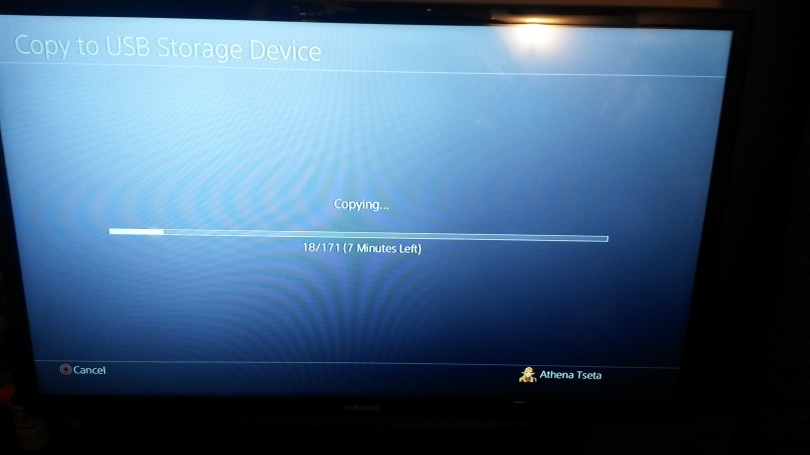
After the screenshots have been copied, it’s time to go save that precious game data.
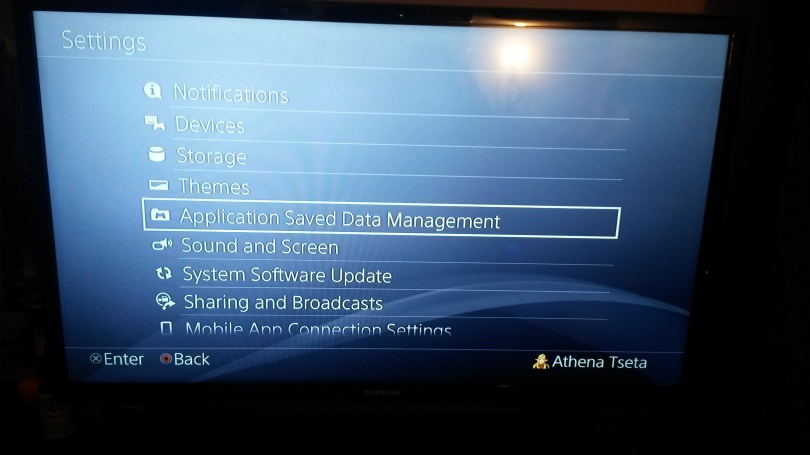
Go to “Settings” >> “Advanced Saved Data Management” >> “Saved Data in System Storage” and then click on “Copy to USB Storage Device.”


Consume another cup of your preferred beverage while you wait.
Once that is done, remove the flash drive, completely turn off the Playstation 4, and unplug any controllers. Also unplug the the other cables leading to the console, like the power cable and the HDMI cable that goes to the television.
Now it’s time for a little surgery.
Diving Into the Beast
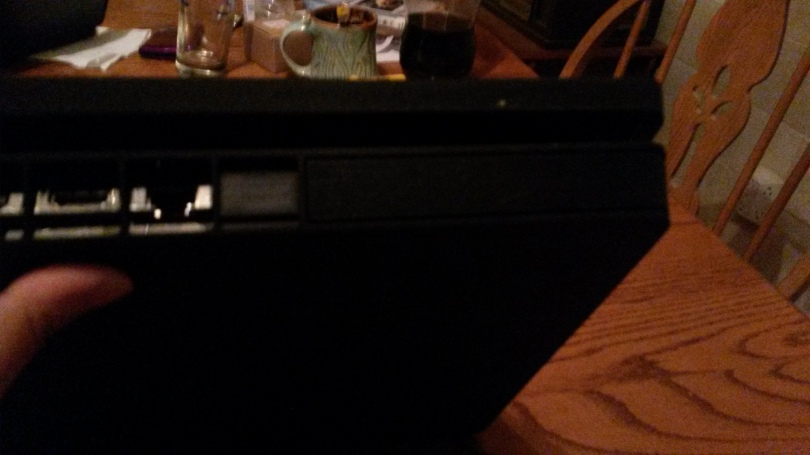
After removing all of the cables and controllers and USBs (and game discs!) and whatever else has been in your Playstation, place it on a clean, dry, flat surface with the power button facing away from you. On the right-hand side of the back panel is a cover that slides out to the right. It takes a little wiggling, but it’s easy to remove without tool. So, remove that.


And then you’ll see the “Playstation screw,” which is a silver screw with the four controller shape icons on it (in the blue circle above). Use the included screwdriver (or an eyeglass screwdriver if you didn’t get the kit) to remove the screw and put it someplace safe where it won’t roll away.

Again on the right-hand side, there should be a little loop of film-looking material. Pull on this to remove the hard drive cradle.

Remove the four screws holding the hard drive in the cradle and replace the old hard drive with the new one.


Screw back into place, and pop the cradle back into the Playstation. It takes a little bit of a push, so don’t be frightened.

Line up the holes for where the Playstation screw will go, and screw back together…

…and pop the panel back on.
Plug the console back into the television and its power source. Also, plug the controller into the console, along with the USB drive from earlier. Then, turn on the console in “Safe Mode.” You can do this by pressing and holding the power button until it beeps twice (there is a pause in between the beeps). Select “Initialize PS4 (Reinstall System Software)” and follow the subsequent prompts.


More waiting.
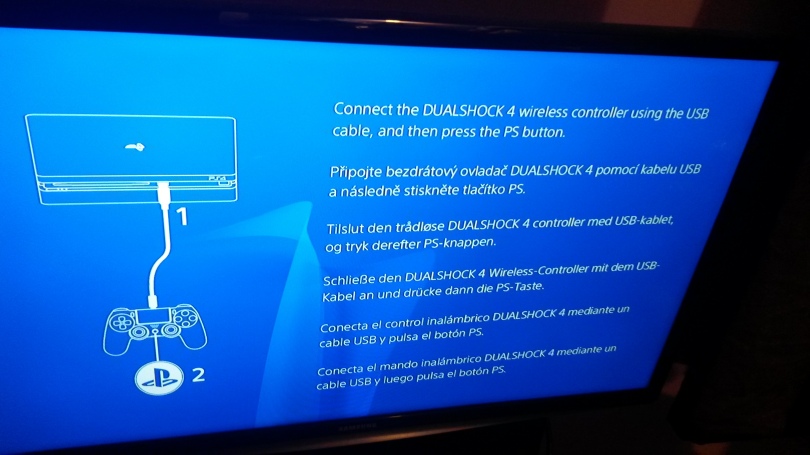
Connect the controller and follow all the set-up onscreen prompts you went through when your Playstation 4 was new, and then…

Yay!
And where once there was this:
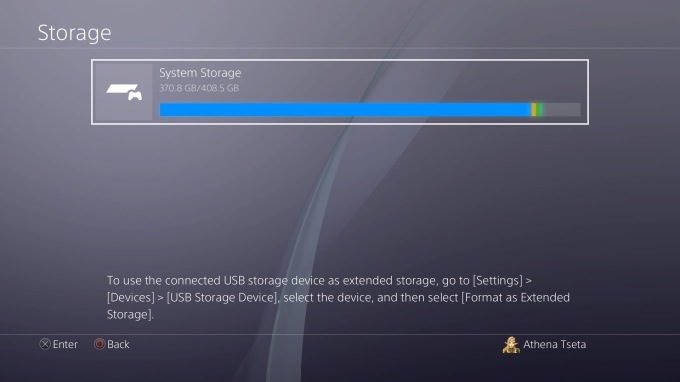
Now there is this:

From there, you can go to the Playstation Store and go into your downloads to find all of your fabulous DLCs, games, skins, and various items that you purchased digitally, all happily awaiting you to download them again onto your system.
But What Do I Do With My Old Hard Drive?
If you have an older PS4 (not the slim kind), you can apparently plug the old hard drive into a rear USB port and use the drive on the PS4. Since mine is a slim… I can apparently use it as external storage for my computer (or, I suppose, internal, but my computer has more memory than the PS4 drive). In any case, you will want to put it in the handy-dandy protective case. It’s very simple… it clicks into the cradle, has four screws, and then the case is held together by two more little screws:


Congratulations! You’ve replaced the hard drive to your Playstation 4!
Have you ever replaced your hard drive? Do you prefer internal or external? Tell me about your techie fixes in the comments below!
Thanks for stopping by, and I’ll see you soon!
~Athena
Do you like what you’ve read? Become a revered Aegis of AmbiGaming and show your support for small creators and for video games as a serious, viable, and relevant medium!

See, I was a bit lazy when it came time to upgrade the storage on my Xbox One. I just bought an external HDD and transferred a bunch of the bigger but lesser played games onto it. I’m not sure I’d trust myself opening a console up.
LikeLiked by 3 people
I’m the same. My Xbox One has an external hard drive. I’m far too scared to open up a console to replace the hard drive. I’ve been told it’s simple to fix my controller if I open it up but again I’m too worried about doing that.
LikeLiked by 3 people
That’s the thing, isn’t it? Simple for one person may not be for another. I’ll happily fiddle with whatever needs tweaking if it doesn’t involve opening it up, but I wouldn’t want to risk doing more without at least practicing first.
LikeLiked by 2 people
You’d be happy to know that you can use an external hard drive on the PS4 as well.
LikeLiked by 2 people
I don’t think you can use them on the slims, because you can’t use the old hard drive as an external drive on the slims, but I think they can be used on the regular ones… I’ll have to double-check, though.
LikeLike
That’s good to know, thank you.
LikeLiked by 1 person
Reblogged this on DDOCentral.
LikeLiked by 1 person
Yay!! Electronics things. Great guide!
All the Day One patches, DLC, digital only games, screenshots, etc. really add up, and 500GB really isn’t enough space for most gamers these days. I take a ton of screenshots so I keep those on a dedicated external hard drive and delete them off my PS4. That helps! I don’t download many games either. I always go for physical copies, if available, since I like collecting them.
LikeLiked by 1 person
I dread the day I have to worry about that. T.T No lie.
LikeLiked by 1 person
It wasn’t as bad as I thought it would be!! Don’t worry 🙂
LikeLike