


A short post for you today, since everything – except my ability to play games and talk at the same time – is up and working, and we’ve had quite a ride the past few weeks with getting everything up and running. Last week we talked a bit about the capture device I’m using, so today I thought I’d delve a little more into the microphone set-up I have. Here we go!
Part II: Microphone
I admit I wanted an excuse to get a decent recording microphone for some music projects I have, so I took the opportunity to splurge a little bit. There are plenty of microphones that would get the job done, but I chose to spring for a fancy condenser microphone. Basically, a condenser microphone is the type of mic you’d generally find in a recording studio: it’s a little more sensitive to the full frequencies of your voice/instrument, and is a little more sensitive to sounds. It generally has a louder output that non-condenser mics, but it also requires its own power source in order for you to fully take advantage of its power. But one step at a time.
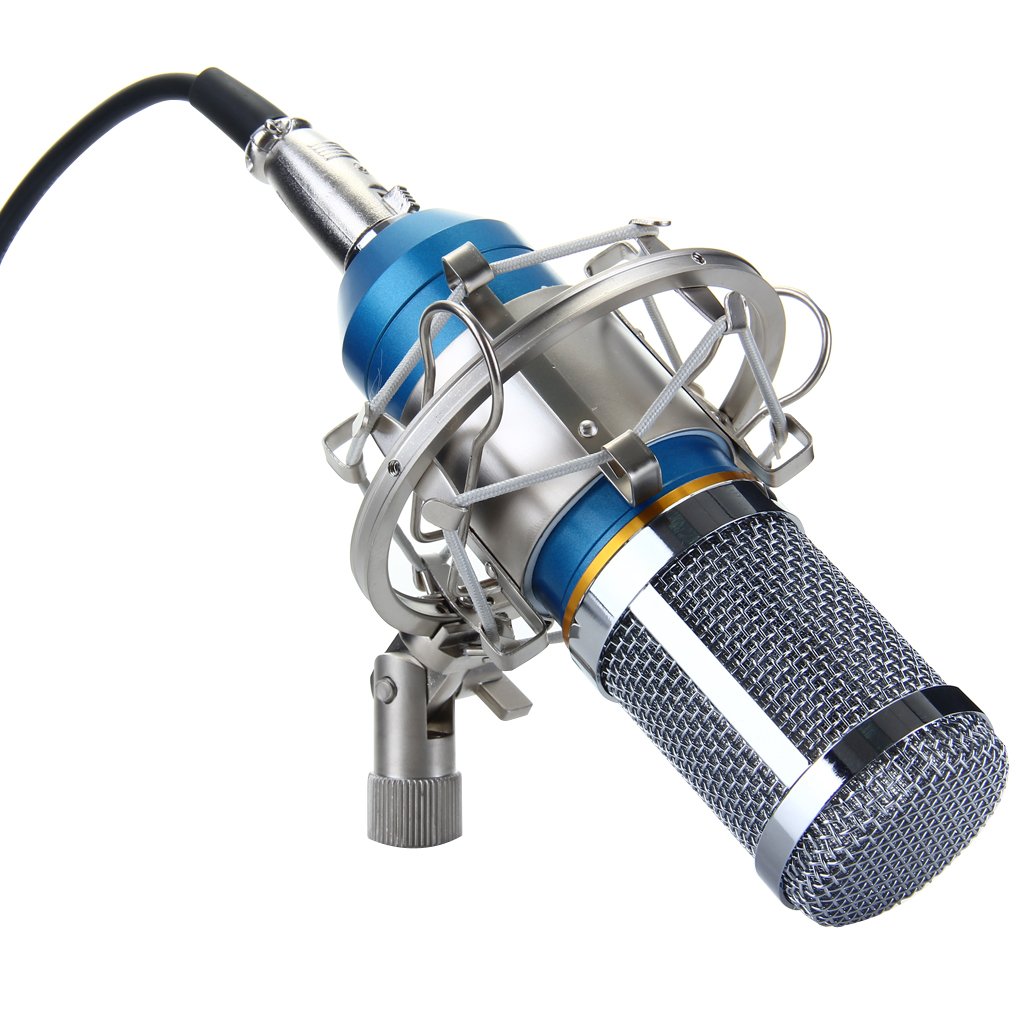
For the microphone, I chose the Floureon BM-800 Condenser mic (again, they’re not paying me for this…). It’s what’s called a cardiod mic, which just means that you don’t have to talk directly into the “top” of it for it to pick your voice up. Most microphones have a recording area that goes out of the top of the mic in a cone shape, but cardiod mics have more of a 3D heart shape coming out of the base/middle of the mic… Just trust me that it picks your voice up from more than one direction 🙂 Mine also came with a little shock mount that can be screwed onto a microphone stand (which I already had). It works; it’s job is to minimize any sound of “bounce” or “bump” that might happen to the stand, so the sound isn’t transferred to the mic. So far, so good!
So far, I really like it. I haven’t played with it too much in regards to music yet, but for my voice it sounds good and does what I need it to do. It came with a wind-screen, which is nice and keeps all the “s”s and “t”s and other plosives from sounding awful, and can plug right into the computer with a 3.5mm jack. Now, I’m recording into the Hauppauge software, or into Audacity, so it’s not exactly high-tech recording software I have, but like I said, for what I need, it works. It even works without the phantom power, although I do hear a bit of a difference between the two.
*edit* I’ve since learned that the 3.5mm jack doesn’t work, as my computer doesn’t consistently recognize the microphone in that jack. I have a 3.5mm-to-USB converter, which plugs into the computer and works nicely. This is something I purchased (SYBA brand). Don’t use the one that came with the mic because it’s terrible and doesn’t work. For an example of the sound, click here.*end edit*
Phantom Power
Now this one is a little tricky. I bought a phantom power box because everything I’ve ever been told about condenser mics is that they don’t work without phantom power. So I dutifully purchased a phantom power box. Don’t get me wrong, it’s a great device, and I like that it has an on/off switch so if you want to switch between the two settings, you don’t have to unplug everything and redo all your wiring.
Like I said, there’s a subtle difference between having the phantom power on and off, and perhaps with a different sound recording program it would make more of a difference. Maybe even once I get around to recording music, it might matter. But as of right now, it’s not something that I would say is a necessity. Maybe because the Floureon is made to plug right into a computer? I don’t know.

At any rate, it’s a good little device, and the name of it is InnoGear I229 Phantom Power, if that’s something you’re interested in dabbling in.
I unfortunately can’t post an audio file onto the site since I’m using the free version, but there are about 15 videos on YouTube that have all different settings with the mic that you can peruse if you are so inclined…
Bits and Bobs
HDMI Splitter: I’ll explain why I have an HDMI splitter when I lay out my set-up, but if you are in need of a good HDMI splitter, I confidently recommend the ViewHD 2 Port 1×2 Mini Splitter (for HD and 3D). It requires its own power source, but the pictures are clear on all the devices that it’s “splitting” to!
HDMI to RCA converter: Again, explanations to follow later, but if you ever found yourself in need to converting your HDMI output signal into good old-fashioned RCA, I’ve been using the Cingk HDMI to RCA composite video/audio converter. Again, it requires a power source, but it converts the HDMI signal to RCA just fine. Not only do I use this for recording, but it’s the only way I can hook my PS4 into my CRT TV…
No special video this week, but if you haven’t already, you should definitely check out our Let’s Play channel, and give it a like and subscribe so you don’t miss the fun!
Next week I’ll talk a bit about the editing software I use, before diving in to what my set-up actually looks like!
Until then, thanks for stopping by, and I’ll see you soon!
~ Athena


Leave a reply to Mr. Panda Cancel reply